Statement of the Problem
In this article, we are going to see how to interface the LM35 Temperature Sensor with Arduino and Monitor the temperature in the LCD screen at the same time when the temperature reaches the above-threshold level an indicator is used to indicate with LED, and a buzzer is used for alarm.
This article helps the reader to understand the interfacing of the LM35 Temperature sensor with Arduino. The LM35 sensor is a type of analog sensor, that produces the corresponding temperature value into voltage. In the following titles, the reader can understand the LM35 sensor in detail.
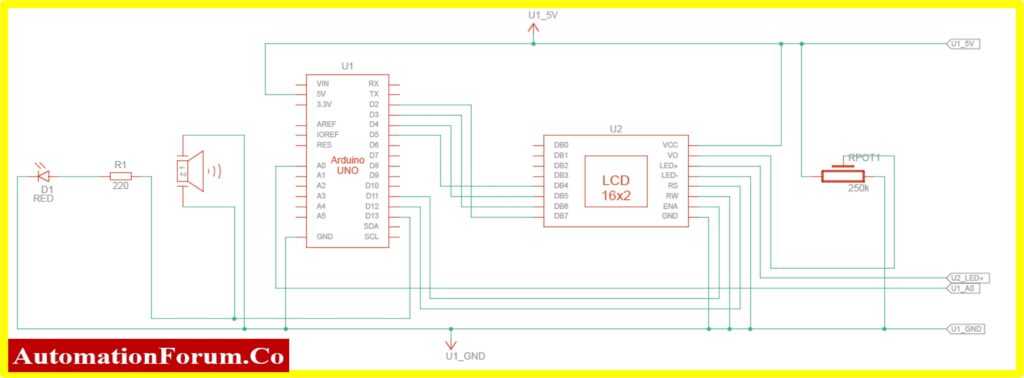
Schematic of Interfacing Potentiometer and LCD with Arduino
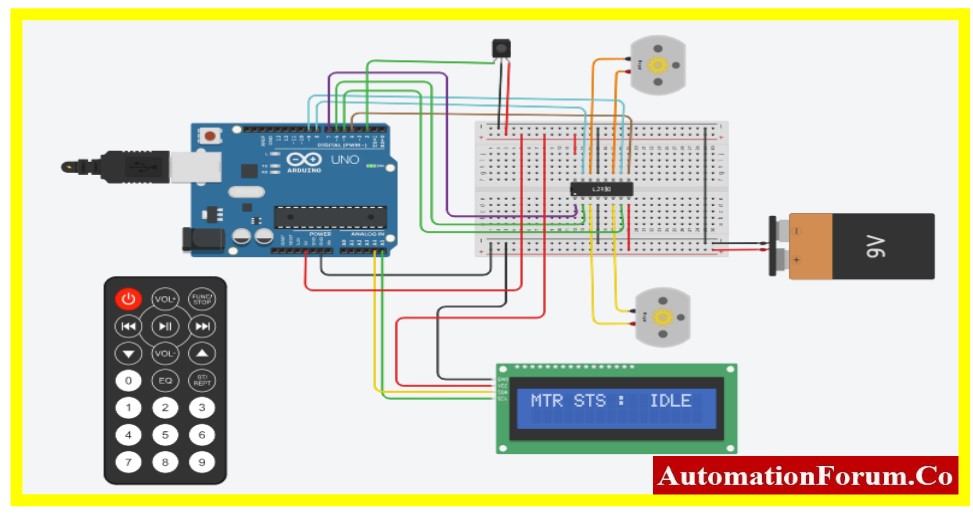
Connection Diagram of Arduino with LM35 LDC and Alarm

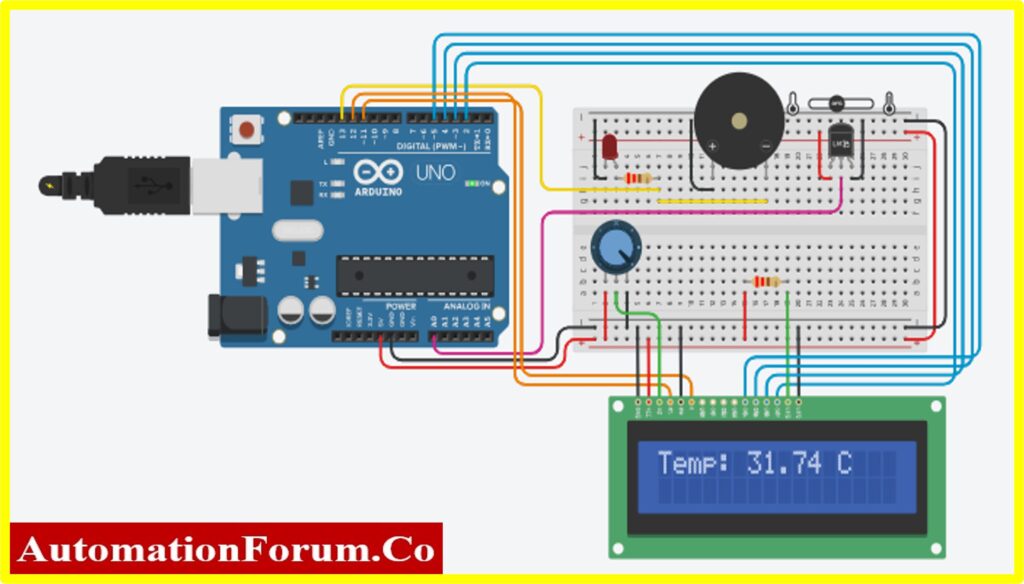
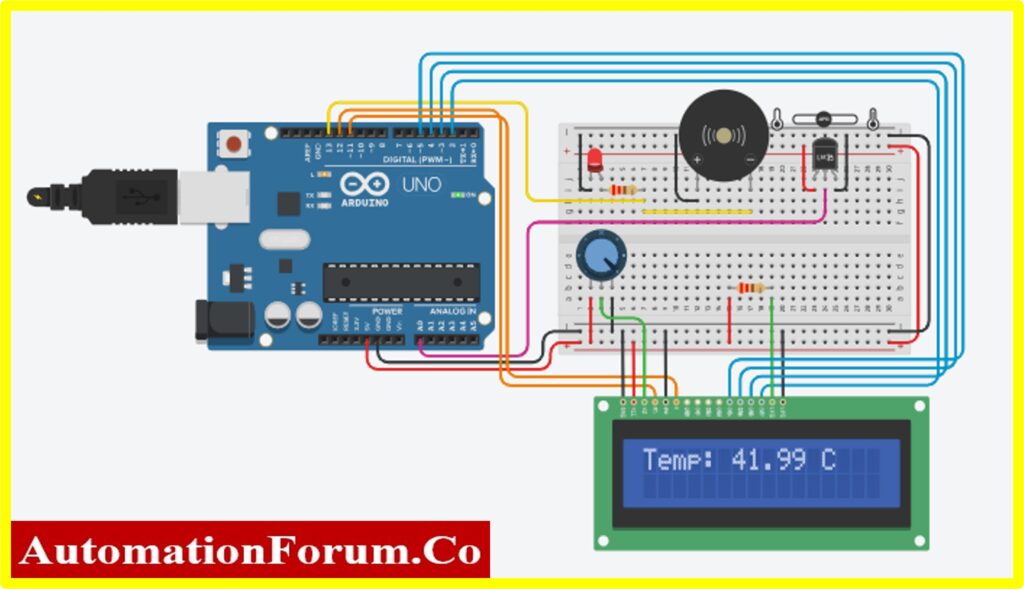
Arduino UNO Connection with LM35 LDC and Alarm

Code for Interfacing LM35 Temperature Sensor with Arduino
#include<LiquidCrystal.h>
int alarm = 13; // LED & Buzzer
int lm35 = 0; // LM35 Temperature Sensor
LiquidCrystallcd(12, 11, 5, 4, 3, 2);
#defineled13 //LED Output Pin
voidsetup()
{
pinMode(alarm, OUTPUT);
lcd.begin(16, 2);
pinMode(led, OUTPUT);
Serial.begin(9600);
lcd.clear();
}
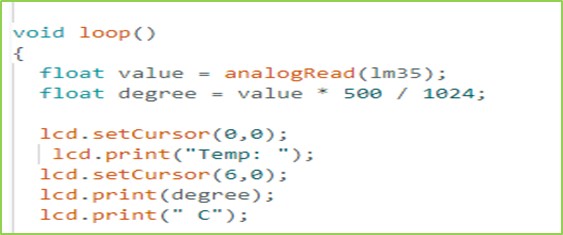
voidloop()
{
float value = analogRead(lm35);
float degree = value * 500 / 1024;
lcd.setCursor(0,0);
lcd.print(“Temp: “);
lcd.setCursor(6,0);
lcd.print(degree);
lcd.print(” C”);
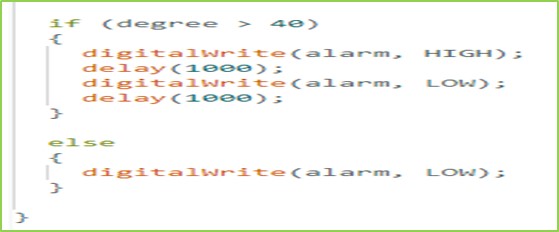
if(degree >40)
{
digitalWrite(alarm, HIGH);
delay(1000);
digitalWrite(alarm, LOW);
delay(1000);
}
else
{
digitalWrite(alarm, LOW);
}
}
Circuit Explanation
The above circuit consists of Arduino UNO, LCD Screen, LM35 temperature sensor, buzzer, and LED. The major part of this article is about interfacing Arduino with the LM35, the following content explains how to interface the sensor with Arduino and various parts of the Project.
Arduino UNO board
The reader can check the details explanation about the Arduino in the following link
LCD screen and interfacing
The reader can check the details explanation about the pins and interfacing of LCD with Arduino in the following link
LM35 temperature sensor
The temperature sensor LM35 produces a proportional analog signal to the current temperature. A temperature reading in Celsius can be simply obtained by interpreting the output voltage. LM35 is better than a thermistor because it doesn’t need external calibration.
Features
- Directly calibrated in Celsius (Centigrade)
- Linear Scale Factor + 10-mV/°C
- Assured Accuracy of 0.5°C (at 25°C)
- Rated for the Full Range of 55°C to 150°C
- Works between 4 and 30 volts
- Current Drain of 60 µA or Less
- Low Self-Heating, Still Air, 0.08°C
- Typical Non-Linearity Only 14°C
- 0.1WLow-Impedance Output for a 1-mA Load
Many members of the LM35 family go by the names of LM35C, LM35CA, LM35D, LM135, LM135A, LM235, and LM335. Although the operation of each member of the LM35 family is the same, their ability to measure temperature differs, and they come in a variety of packages (SOIC, TO-220, TO-92, TO).
It is stated as +10 millivolts per degree centigrade in the LM35’s characteristics. The temperature value rises by one with every 10 millivolts increase in the sensor output. The temperature in centigrade, for instance, will be 10 degrees centigrade if the sensor is producing 100 millivolts at output. The negative temperature reading operates in the same way. The sensor will produce an output of -100 millivolts, which corresponds to a temperature of -10 degrees Celsius.
For the LM35, the formula to convert voltage to centigrade temperature is
Centigrade Temperature = Voltage Read by ADC / 10 mV (milliVolt)
Buzzer
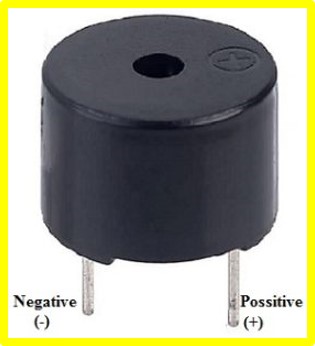
A beeper or buzzer could be electromechanical, piezoelectric, or mechanical in design. The signal’s main purpose is to turn audio into sound. It is frequently powered by DC voltage and utilized in timers, alarm clocks, printers, computers, and other electronic devices. Depending on the different designs, it can emit a wide range of sounds, such as alert, melody, bell, and siren. In this project, an alert is provided by a buzzer whenever the temperature exceeds the threshold, the Buzzer gives an alarm at the same time the LED goes ON.
Code Explanation
Interfacing the Arduino with LCD and Potentiometer has Six sections
In the first section LCD header file is declared. Since the project used LCD interfacing.

In the second section, various variables used in the programs are declared. The alarm and lm35 are the variable names. Pin number 13 and Analog pin A0 are declared with the above variable name. Similarly, LED is also connected in pin 13. It can be declared with another function, using define (another way declaring pin number)

In Section Three the LCD library is declared with the pin number of the Arduino

In Section Four declaration of input and output. The pinMode function declares the corresponding pin as either input or output. The pinMode function is configured for digital input and output, in this project only two digital outputs alarm and an LED pin. The other functions are such as LCD and serial communication declaration. Since the Analog pin A0 is input pin as default.

In the next section, the task Arduino going to perform. In this project, the LM35 sensor is connected to the Analog input of the Arduino. The Arduino reads the analog data and stores the data in a variable.
The Temperature value is not an integer. Therefore, the analog value is stored in the float variable value.
The value stored is converted into degrees using the above formula mentioned (shown in the program).
Finally, the stored data is displayed on the LCD screen using the LCD function
The last section of the project is used for alarm and indication. If the temperature goes above the threshold level (here 40), the alarm and LED goes ON.
Result
Temperature below 400C
Temperature above 400C (Buzzer and LED is “ON”)
The reader will be able to interface an LM35 and LCD with Arduino by completing the aforementioned activity.